
In today’s fast-paced digital world, visuals are key to storytelling, and turning static images into dynamic videos is one of the most powerful ways to engage an audience. Whether you’re a content creator, marketer, or hobbyist, Dreamlux’s AI-powered Image to Video tool offers an easy and efficient way to animate your images without requiring advanced video editing skills.
If you're new to this tool, don’t worry. This beginner’s guide will walk you through everything you need to know to get started with Dreamlux’s image to video AI free without watermark. Let’s dive in!
What is Dreamlux’s Image to Video AI Tool?
Dreamlux Image to Video AI tool is designed to transform static images into animated videos. By leveraging advanced AI technology, this tool can bring your still images to life by generating fluid, realistic motion and transitions. Whether you're turning photos into cinematic sequences, creating promotional videos, or making social media posts, Dreamlux makes it simple to create high-quality content.
The best part? You can do all of this without worrying about watermarks, which is a feature often restricted in other AI tools. Dreamlux allows users to create professional-quality videos completely free of charge, making it an attractive option for both beginners and seasoned creators.
Key Features of Dreamlux’s Image to Video AI Tool
Before we get into the step-by-step guide, let’s take a quick look at some of the key features that make Dreamlux’s Image to Video tool stand out:
-
Free to Use Without Watermark
Dreamlux allows you to create videos without any watermarks, which is a huge advantage if you're using these videos for professional purposes or personal projects. -
AI-Powered Video Creation
The tool uses artificial intelligence to convert images into high-quality videos. You don't need any technical skills or prior video editing experience. -
Diverse Templates and Effects
Dreamlux lets you choose from a variety of pre-made templates and apply effects such as zoom, camera pans, and smooth transitions to enhance your video. While it doesn’t support customized styles at the moment, the available templates and effects still offer plenty of creative flexibility to bring your vision to life.
-
High-Quality Outputs
The tool ensures that your videos are produced with sharp details and vibrant colors, giving your content a polished, professional look. -
Cloud-Based Platform
Dreamlux is cloud-based, so you can access it from any device with an internet connection and work on your videos anytime, anywhere.
Now that you have an understanding of its features, let’s break down how to get started using Dreamlux’s Image to Video AI tool.
Step-by-Step Guide to Using Dreamlux’s Image to Video AI Tool
Step 1: Sign Up or Log In to Dreamlux
To get started, you’ll need to create an account or log in if you already have one. Dreamlux’s cloud-based platform makes it easy to sign up with an email address or through a social media account. Once you’re logged in, you’ll be ready to start converting your images into videos.
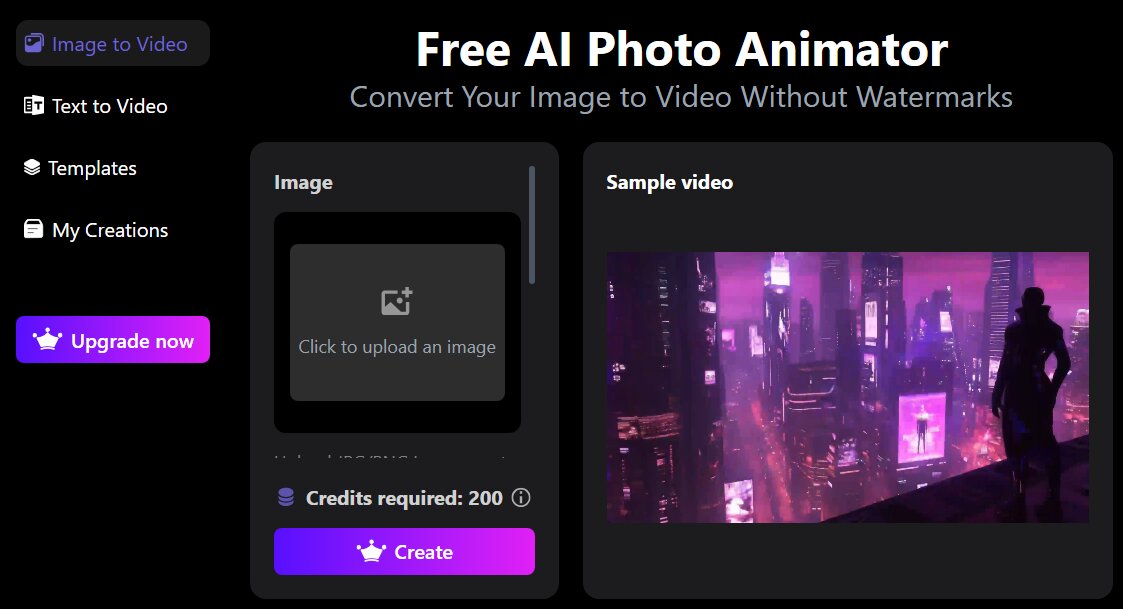
Step 2: Upload Your Image
The first step in the actual conversion process is to upload the image you want to animate. Dreamlux supports a variety of image formats such as JPEG, PNG, and more, so you don’t need to worry about compatibility issues. Simply click the “Upload” button, select your image file from your computer or device, and it will be uploaded to Dreamlux’s platform.
Step 3: Add a Prompt (Optional)
Below the uploaded image, you’ll find a prompt textbox. Here, you can enter a short description of the action or scene you want the AI to generate. This optional input helps guide Dreamlux in creating a video that aligns more closely with your vision. Whether it’s a cinematic pan through a forest or a soft zoom on a peaceful landscape, your prompt gives the AI context to work with and enhances the final result.
Step 4: Generate the Video
Once you’ve added a prompt (or chosen to skip it), you can move on to generating the video. Dreamlux uses its AI engine to automatically apply effects such as zooms, pans, and transitions based on the image and any prompt you've provided. There’s no need to manually tweak settings—just click generate, and the AI takes care of the rest. The process is quick and typically completes in a few minutes.
Step 5: Preview the Video
After generation, you’ll be able to preview your video. If the final result doesn’t match your expectations, you can re-generate it by editing or refining your prompt. This step gives you a chance to adjust the outcome and get closer to the visual style or message you’re aiming for—without the need for complex editing tools.
Step 6: Download and Share
Once the video is generated, Dreamlux will notify you that it’s ready for download. You can then download your video in high resolution, completely free of watermark, and start using it in your projects.
The video can be shared across various platforms, from social media sites like Instagram, Facebook, and TikTok to business presentations and personal websites. Dreamlux ensures your video looks polished and professional, making it perfect for any platform.
Why Choose Dreamlux for AI Image to Video Conversion?
While there are numerous AI tools available for image-to-video conversion, Dreamlux stands out for several reasons:
-
No Watermarks: Dreamlux allows you to create videos without any intrusive watermarks, which is especially important if you're using the video for professional content or marketing purposes.
-
Free Trial Access
Dreamlux is not completely free, but it offers a free trial that lets you explore its core features without any upfront payment. This gives you the opportunity to test the platform, create videos, and experience its AI-powered tools before deciding whether to upgrade to a paid plan. Unlike some tools that require a subscription from the start, Dreamlux gives you a risk-free way to get started. -
High-Quality Output: The AI engine ensures that the videos are high-resolution, smooth, and visually appealing, making them perfect for all types of content.
-
User-Friendly Interface: Whether you're a beginner or an experienced creator, Dreamlux’s simple and intuitive interface makes it easy to create stunning videos from your images in just a few clicks.
-
Cloud-Based Platform: With Dreamlux being cloud-based, you can access it from any device, making it incredibly convenient for creators who work on the go.
Conclusion
Dreamlux’s Image to Video AI tool is a game-changer for anyone looking to create professional-quality videos from images. With its easy-to-use interface, free access without watermarks, and advanced AI features, Dreamlux makes it simple to bring your visual content to life.
Whether you’re new to video creation or looking for a more efficient way to animate your images, Dreamlux offers a powerful, accessible solution. So why not give it a try? Visit Dreamlux’s website today to start creating your own animated videos from images – and experience the power of AI at your fingertips.
Website of Source: https://dreamlux.ai/
Source: Story.KISSPR.com
Release ID: 1408468