
Wedding photographers usually take bridesmaid photos in a group with the bride as the focal point, but with your beautifully donned hair and elegant bridesmaid robes, you certainly can’t resist taking photos with only yourself too. As much as you’d like to have professional photo memories with the gang, you’ll want to take photos for yourself too, even if just through your phone.
The tips we’ll give you will work for all time, which you should not miss out on especially when you are in your best look and on a very special day. Plus, you can take advantage of the spectacular background too, given the wedding themes and designs. Here are some photoshoot inspirations you might want to try that can make you feel like a model for the day but look all-natural:
Avoid Square to the Camera Shot
If you pose full body square to the camera, you will usually look wider despite your size. Even professional models who position themselves that way look wider in photographs too. If you want to achieve a lean, feminine look on your satin robes, turn your body away from the camera for at least two-thirds while your full face directs to the camera, making it 45 degrees facing the camera.
You can also just step back any of your feet if you don’t want to turn by two-thirds or scale back by leaning one of your shoulders closer to the camera. A little body twist or step back of one of your feet can make a really huge difference.
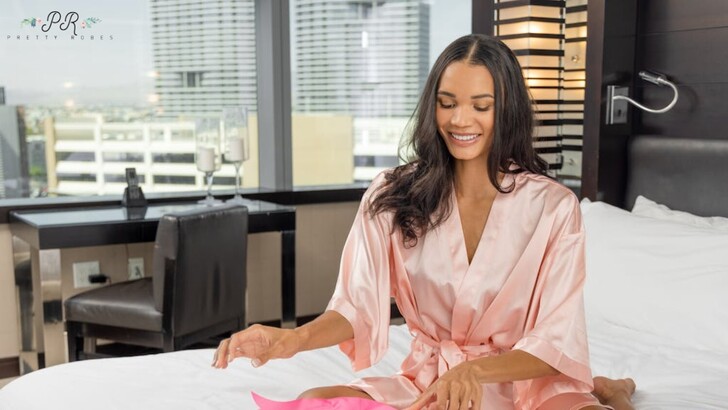
Take a Slightly Above Eye-Level Shot
While this angle gives off perfect bikini shots, this could still be used even when you’re wearing a bridesmaid robe, especially when it is body fit. The key is to angle the camera slightly above eye level. When you are curvy enough, the angle would make you look curvier. It makes your chin and jawline look more defined too.
This angle will make any woman look smaller and well-shaped. Since you are wearing a robe, you can try sitting or lying down while your appointed photograph takes shoot from above. This will accentuate your shape and highlight the elegant robe you are wearing.
Give Off a Strong Jawline Look
Everyone wants a well-contoured jawline but even if you don’t think you have that, there are tricks to that. But first, take care of the double chin. To give your jawline a sharper look, make sure double chins don’t stick out.
For that, you can try pressing your tongue to the roof of your mouth, and not against your teeth, when you are smiling. It might feel a bit unusual but this technique can greatly help with ridding off double chins while strengthening the jawline and giving the neck a lengthy look.
Another technique is to bring your head forward to bury the double chin down, an easier way to make your jawline look sharper and more attractive.
Slightly Open Your Mouth
A tightly closed mouth implies boredom, resistance, or anger, while a slightly opened mouth, with a little distance between the lips, tends to mean agreeability, openness, vulnerability, or willingness.
The jawline will typically clench when your mouth is closed, giving the appearance that the sides of your face are heavier. You will give off much more pleasant energy and your jawline looking more lengthened by slightly opening your mouth in the photo.
Since you are attending a wedding, even wearing a wedding-themed robe, try to appear lively and warm, just as the vibe of the event you are in.
Know What to Do with Your Hands
Usually, the size of your hands is the same as that of your face, so take care not to place your hands near your face. You can instead position your hands in the hair, to the side, over the shoulder, or beneath the chin.
In terms of proper finger positioning, you’ll look better in photos when your hands press against nothing. Make your fingers slightly curved, apart, and just a little bit touching your face or hair. Apply these so you can avoid having a repertoire of photos with awkward hand placements all over.
Make a Gap Between Your Arms and Body
You might have seen models simply putting their hands to their sides, but unfortunately, this might not work with all women as pressing your arms against your body will only make them look larger than they are.
To avoid making your arms look thicker than they are, make sure you give a distinct space between your body and arms. You can simply place your hands on your hips or bend your elbows to make enough gaps. Whichever of these you use, just make sure that there is a clear space between each of your arms and torso.
Make Way for the Curves
Just as you want a contoured jawline and well-defined chin, you might dote for a curvier look too. Having curves makes you look more feminine but even if you don’t think you have, there are some photography tricks you can use.
In your standing poses, bend one of your knees and put your whole weight on your back foot. No matter your size, this pose can give you gorgeous curves in your photos, all the way to the front hip and leg. Then bend your elbow a little too to accentuate the curve in your waist.
Wearing stretchable satin robes for women, you can nail this technique, especially when it fits your body well. Curves can instantaneously make you look stunning in your photos.
Use Your “Favored” Side
You might have already discovered by now that you have a side that looks better in photos or you are more comfortable with. Take advantage of your favored side, facing the camera at that angle as often as possible.
Know Your Head Angles
Even a little tilt of the head makes a huge difference, even with the same body pose. If you want to give a confident vibe, tilt your head slightly back with your nose looking down at the camera. This works best for you if you already have a sharp jawline.
For an engaging photo, you can move your ear closer to one of your shoulders with your chin tilted down. If you want to look bolder and more challenging, tilt your chin up with the same ear and shoulder distance pose.
Practice
You don’t have to apply all the poses you learned at once. Start practicing in front of a mirror and when you pose for photos, use at least three. That way, you will get more comfortable with them and will look natural when you have photo ops.
Not only will these poses help you look natural, feminine, and stunning for your solo bridesmaid shots but they apply to almost any occasion there are. Take note that what’s closer to the camera will look bigger, and it depends on you what kind of look you want to see yourself in your photos.
Source: Story.KISSPR.com
Release ID: 509173