
Macs and MacBooks are awesome devices that allow us to save load of virtual pictures. The new running structures like Monterey, Ventura, and Sonoma provide customers with great functionality. While, it may be easy to accidentally delete photos with the click of a button, recovering those photos can be a task. This can bring about completely deleted or lost pics.
If you have by accidentally deleted important photos, don’t worry. There are multiple methods to get your lost photographs recovered. We're going to show you a few proven methods to recover deleted photos on Mac in any data loss situation.
Part I: Utilize Mac internal Recovery methods:
Recover Photos from the "Recently deleted" folder:
The photo recovery mac app on macOS Sonoma and lower versions like Big Sur, Catalina, and Mojave ensures that your images aren’t deleted in a single fell swoop. The "Recently deleted" folder continues the deleted photos for 30 days. So, in case you delete snapshots and later realize that you need to keep them, you can restore them from this folder within the Photos app.
Restore lost photos from the Trash
If the deleted photos are not found in the 'Recently Deleted' folder, Finder, or other applications, locate them in the macOS Trash bin. The Trash retains deleted data for 30 days or until manually emptied.
Steps to recover deleted photos from Trash on MacOS:
-
Go to the Trash Folder.
-
Locate the deleted photo and right-click on it.
-
Choose 'Put Back.'
The deleted photos will be saved to its original location.
Retrieve erased photos from iCloud
If you employ iCloud for Mac backup, retrieve your misplaced photos from this source. Similar to the Photos app, iCloud features a 'Recently Deleted' folder, safeguarding images for 30 days. Once this duration elapses, iCloud will permanently delete the pictures.
Steps to recover deleted photos from iCloud:
-
Visit icloud.com and log in to your account using your Apple ID.
-
Access the Photos section.
-
Locate the Recently Deleted album.
-
Choose the desired photos and click on "Recover."
The deleted photos will be saved on your device.
Recover Accidentally Deleted Photos with Time Machine
Time Machine, a pre-installed software on each MacBook, serves as a first-rate nearby backup tool and proves treasured in the recuperation of pictures from older backups.
If you've previously enabled and configured Time Machine to back up your images within the historical past, the restoration system is simple.
-
Start with the aid of opening the folder in which your photos were saved with the help of Finder.
-
Next, click on the Time Machine icon within the menu bar and choose "Enter Time Machine."
-
Navigate back in time using the right arrows until you locate the deleted photographs you want to restore.
-
Choose the images and click on "Restore" to go back to their original vicinity.
Keep in mind that the time required for image library recovery may also vary primarily based on the size of your library.
Part II: Utilize Mac photo recovery software
If your deleted photos are not found in backups, Trash, or the 'Recently Deleted' folder within the Photos app or iCloud, go to photo recovery software for assistance.
An advanced mac photo recovery tool like Stellar Photo Recovery, now compatible with the latest macOS Sonoma 14 Edition can effectively rescue you from various photo loss scenarios. Whether you have formatted the macOS drive or external media, emptied the Trash, or encountered missing photos for unclear reasons, the software excels in recovering from all critical situations.
This software allows you to retrieve lost photos of almost any file type, including RAW, JPEG, TIFF, PNG, DNG, NEF, SR2, etc. It supports photos taken with cameras from Sony, Canon, Fujifilm, Nikon, Olympus, and other manufacturers.
Key Benefits:
-
Restores deleted photos with the original date-timestamp and names and retrieves camera RAW files.
-
Stellar Photo Recovery for Mac now supports Apple devices with T2, M1, M2, and M3 chips without disabling SIP or adding KEXT.
-
With the new Stellar Photo Recovery, you can now personalize the theme of your software, choose from Vibrant, Dark, and Light themes.
-
The new version of Stellar Photo Recovery Mac supports fragmented MOV & MP4 video recovery from removable thumb drives and memory cards.
-
The new version of the Mac Photo Recovery support Linux Files System EXT2, EXT3, and EXT4 to recover lost photos, videos, and audio files.
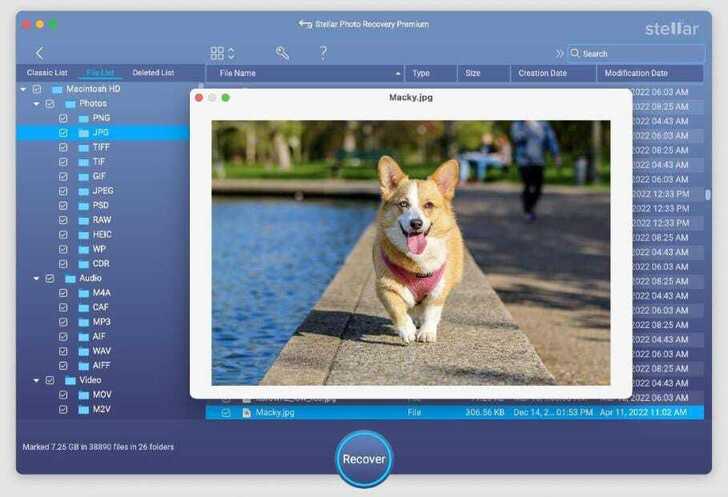
Steps to recover deleted photos from Mac:
-
Download and install Stellar Photo Recovery on your Mac.
-
On the "Select What to Recover" screen, choose your preferred files to scan.
-
Next, specify the location from where you want to recover your deleted photos.
-
Initiate the scanning process and preview the located photos.
-
Once the scanning is completed, choose the desired photos for restoration and click on Recover.
Losing cherished photos can be distressing, and the inability to recover them intensifies the frustration. However, taking prompt action is crucial. We hope this guide has provided valuable insights into recovering deleted photos on your Mac.
Conclusion:
Unintentional photo deletions can occur unexpectedly, causing feelings of anxiety and distress, especially when the photos hold significant importance to us.
Fortunately, there are multiple methods available for recovering these precious images. This article outlines various approaches you can try to retrieve photos that may have been accidentally lost or deleted from your Mac. Thankfully, the task of recovering deleted pictures on Mac is not overwhelming.
Source: Story.KISSPR.com
Release ID: 915290